
Creating a DIY light table on a budget is simple and cost-effective. You can repurpose acrylic sheets or glass as a surface and attach affordable LED strips or panels underneath for even lighting. Using basic tools and inexpensive materials, you’ll get a functional, customizable setup perfect for art, tracing, or educational tasks. With a few simple steps, you’ll have a professional-looking light table—keep going to discover more tips and tricks to optimize your project.
Key Takeaways
- Use affordable LED strip lights and repurpose transparent surfaces like acrylic or glass for cost savings.
- Customize the size and brightness with basic electrical wiring and dimmer switches for flexibility.
- Repurpose existing materials such as old picture frames or plastic containers to create DIY light tables.
- Focus on safe, energy-efficient LED lighting to keep costs low and ensure user safety.
- Follow simple tutorials and step-by-step guides to build effective light tables without professional help.

Have you ever wanted a simple, cost-effective way to enhance your creative projects or educational activities? Building a DIY light table might be just what you need, and you don’t have to spend a fortune. With some basic materials and a little ingenuity, you can create an effective light source that’s perfect for art, design, or learning exercises. The key is to focus on affordable LED lighting options and transparent surfaces that distribute light evenly.
LED lighting is your best friend here because it’s energy-efficient, long-lasting, and inexpensive. You can find inexpensive LED strips or panels online or at local hardware stores. These LEDs produce bright, consistent light without generating much heat, making them ideal for a light table. To get started, measure and cut the LED strips to fit your chosen surface, then connect them to a power source. You’ll want to secure the LEDs to the underside of your transparent surface, ensuring the light is evenly distributed across the entire surface area. This setup provides a consistent glow that makes colors and details pop, perfect for tracing, examining objects, or creating vibrant artwork.
LED lights are energy-efficient, durable, and perfect for evenly illuminating your creative projects.
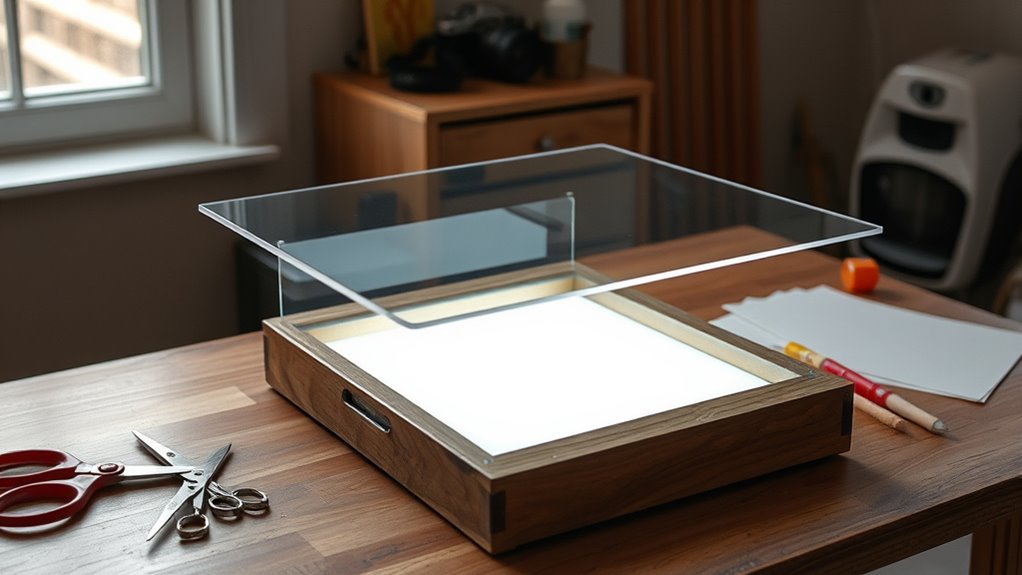
Speaking of transparent surfaces, you have multiple options depending on your budget and preferences. Acrylic sheets or tempered glass work beautifully because they’re durable and provide a smooth, even surface for your projects. Acrylic is lightweight and less prone to shattering, making it a safe choice, especially if kids will be involved. You can find these transparent surfaces at hardware stores or online, often in large sheets that you can cut down to your desired size using a simple saw or utility knife. Place the acrylic or glass on top of your LED lighting setup, and you’ll instantly have a professional-looking light table. If you want to get creative and save money, consider repurposing old glass picture frames or clear plastic containers as your transparent surface.
To enhance safety and efficiency, choosing LED lighting over traditional bulbs is advisable because LEDs produce less heat and have a longer lifespan, aligning with the safety considerations of DIY projects. Once assembled, you can customize your DIY light table by adding a dimmer switch if you want adjustable brightness, or by framing the edges with inexpensive materials to give it a finished look. The beauty of this project is that it’s highly adaptable—you can scale it up or down depending on your space and needs. Plus, it’s a fantastic way to learn about basic electrical wiring and surface materials while creating a tool that boosts your productivity. Whether you’re working on detailed artwork, examining specimens, or teaching kids about light and color, a DIY light table built on a shoestring budget can be a game-changer. It’s simple, effective, and a satisfying way to upgrade your creative or educational space without breaking the bank.
Frequently Asked Questions
What Safety Precautions Should I Consider When Building a DIY Light Table?
When building a DIY light table, you should prioritize electrical safety by ensuring all wiring is properly insulated and connections are secure to prevent shocks. Handle materials carefully, especially when working with tools or electrical components, to avoid injuries. Keep your workspace organized, avoid overloading circuits, and test your setup before use. These precautions help keep you safe while creating your light table, making the process safer and more enjoyable.
Can I Customize the Size and Shape of My DIY Light Table Easily?
Imagine building a light table tailored to your space, like a hobbyist who customized theirs for art projects. You can easily customize the size and shape of your DIY light table by choosing appropriate materials and adjusting measurements during construction. Whether you want a compact, rectangular surface or a unique, irregular shape, planning ahead makes shape modifications straightforward. Flexibility allows you to create a perfect fit for your specific needs.
What Are the Best Materials for Diffusing Light Evenly?
You want even light diffusion, so using the right materials is key. LED strips are great for providing bright, energy-efficient illumination. To diffuse the light evenly, you should use diffusion panels, like frosted acrylic or vellum paper, which spread light smoothly without hotspots. These materials work well together, ensuring your DIY light table is consistently lit and perfect for your creative projects.
How Energy-Efficient Are Homemade Light Tables Compared to Commercial Ones?
Homemade light tables can be quite energy-efficient if you choose LED lighting, which offers high LED efficiency and low power consumption. Compared to commercial models, DIY tables often use less energy because you select only the necessary lighting components, avoiding unnecessary features that increase power use. By optimizing your LED setup, you can create an energy-efficient light table that saves on electricity while providing bright, even illumination.
What Are Common Troubleshooting Tips if My DIY Light Table Doesn’t Illuminate Properly?
If your DIY light table isn’t illuminating properly, start troubleshooting by checking the wiring for loose connections or damage. Make certain all wiring is secure and correctly connected. If the wiring looks fine, consider replacing the bulb, as it may be burnt out. Always turn off power before bulb replacement to avoid shocks. These steps help identify common issues and get your light table working again quickly.
Conclusion
Think of your DIY light table as a lantern you’ve crafted in the dark—guiding your creative journey without draining your wallet. Just like a lighthouse standing tall against storms, your homemade light table illuminates your projects, inspiring confidence and innovation. With a little effort and resourcefulness, you’ve built a beacon that sparks ideas and brightens your workspace. Keep shining bright, knowing that even on a shoestring, your creativity can light up the world.