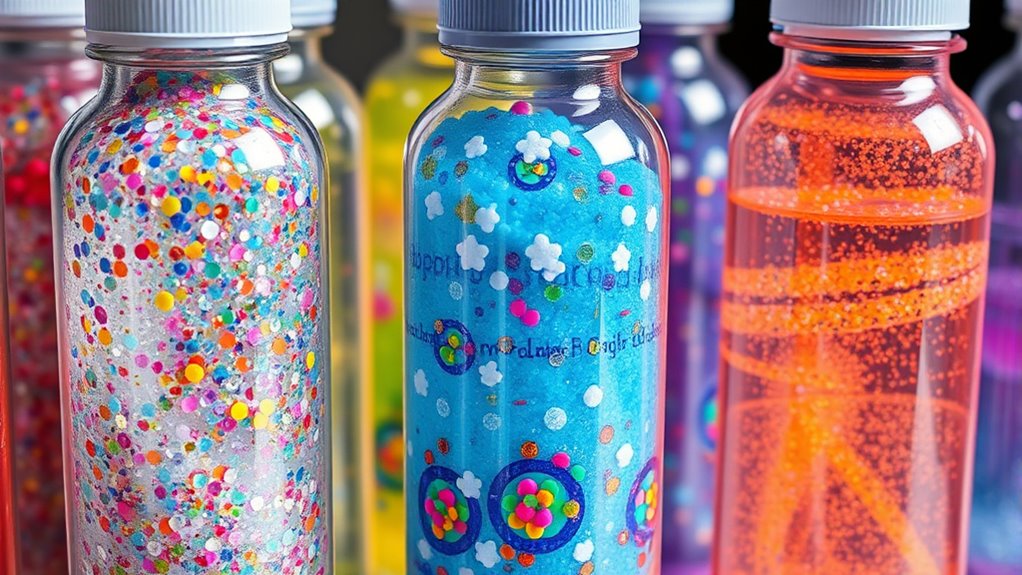
To create DIY sensory bottles that actually work, choose clear containers like plastic bottles or jars, filling them with glitter, tiny beads, or colored water for visual interest. Seal the lid tightly with glue or waterproof tape to prevent spills. Use bright, slow-moving materials to promote calming observation and mindfulness. Personalize by adding favorite colors or small toys. If you’re curious about more ways to craft effective sensory tools, keep exploring these ideas further.
Key Takeaways
- Use sturdy, clear containers filled with glitter, beads, or colored water for engaging visual movement.
- Seal lids tightly with waterproof tape or glue to prevent spills during use.
- Incorporate bright colors and slow-moving materials to promote calming and mindfulness.
- Personalize with favorite colors, small toys, or scents to enhance engagement and sensory appeal.
- Use bottles as visual focus tools during stress relief, encouraging slow observation and breathing exercises.
Creating DIY sensory bottles is a fun and simple way to engage children’s senses and promote calmness. These bottles serve as effective tools for providing visual stimulation, which is vital for helping kids focus and settle down. When you design sensory bottles thoughtfully, they become calming techniques that children can turn to whenever they need a moment of peace or sensory input. Visual stimulation is at the core of these bottles; the way glitter, beads, or colored liquids move and swirl can captivate a child’s attention and soothe their nerves. As they watch, the slow movement of the contents can create a mesmerizing effect that helps reduce anxiety and promote mindfulness.
Creating DIY sensory bottles offers a calming, visual focus that helps children relax and develop sensory awareness.
To make an effective sensory bottle, start by choosing a clear, sturdy container like a plastic water bottle or a small jar. Fill it with a variety of visually interesting materials—glitter, sequins, tiny beads, or colored water—ensuring there’s enough to create movement and visual interest. You can add food coloring or liquid watercolor to enhance the visual appeal. Once filled, seal the lid tightly with glue or waterproof tape to prevent spills. The key to maximizing visual stimulation is selecting items that move easily and catch the eye. Swirling glitter or floating beads will create dynamic visuals that hold a child’s attention, making the bottle not just a calming object but also a sensory learning tool.
When kids watch these bottles, they naturally develop calming techniques by focusing on the slow, rhythmic movement inside. This mindful observation helps them slow down their breathing and quiet their racing thoughts. Encourage children to observe the bottle closely, noting how the contents shift and settle. This focus on movement and color can serve as a grounding activity during moments of stress or overstimulation. You might guide them to take deep breaths as they watch, creating a calming routine. These bottles can also be customized to suit individual preferences—adding favorite colors, small toys, or even scented elements—making the calming technique more personalized and effective.
Incorporating DIY sensory bottles into daily routines offers a hands-on, engaging way to teach children self-regulation and sensory awareness. They’re inexpensive, easy to make, and adaptable, making them ideal for home, classroom, or therapy settings. By focusing on visual stimulation and using calming techniques through watching the gentle swirl of contents, you give children a simple yet powerful tool to manage their emotions and enhance their sensory experience. The visual appeal and tranquil movement of these bottles make them a beloved resource for promoting calmness and sensory development.
Frequently Asked Questions
How Long Do DIY Sensory Bottles Typically Last?
DIY sensory bottles typically last several months to a year, depending on bottle durability and filling longevity. You can prolong their life by choosing sturdy bottles and sealing them tightly to prevent leaks. Regularly check for cracks or leaks, and replace or reseal as needed. Proper care ensures your sensory bottles stay functional longer, providing engaging sensory experiences without needing frequent replacements.
Are There Any Safety Concerns With Homemade Sensory Bottles?
Oh, the irony of DIY sensory bottles—thinking they’re perfectly safe, yet overlooking child safety. You should watch for choking hazards, especially small parts or loose lids, which pose real risks to children. Always supervise play, secure lids tightly, and avoid using small, breakable items. While homemade bottles are fun, staying mindful of potential safety concerns guarantees your child can enjoy them without accidents.
Can Sensory Bottles Be Used for Therapeutic Purposes?
Yes, sensory bottles can be used for therapeutic purposes, especially for sensory processing and emotional regulation. When you use them, you provide a calming tool that helps individuals focus and self-soothe during stressful moments. By engaging with the visual stimuli, you support emotional regulation and sensory integration. Just make certain the bottles are safe and appropriate for the user’s age and needs, and incorporate them into a broader therapeutic plan for best results.
What Are the Best Materials for Filling Sensory Bottles?
You should choose filling options like water, glitter, beads, or small toys for your sensory bottles. Use clear glue or oil to create interesting visual effects. To guarantee safety, seal the bottles tightly with hot glue or waterproof caps, and double-check the sealing techniques to prevent leaks. This way, your sensory bottles stay secure and engaging, providing a calming experience for anyone using them.
How Do I Clean and Maintain Sensory Bottles Over Time?
Think of your sensory bottle as a treasured garden that needs regular care. To keep it thriving, use gentle cleaning techniques like rinsing with warm water and avoiding harsh chemicals. Periodically check for leaks or cloudiness, and replace the water or fill materials if needed. Proper cleaning and maintenance guarantee your sensory bottle’s longevity, allowing you to enjoy its calming effects for years to come.
Conclusion
Now that you know how to create your own sensory bottles, you’ve got a world of calming colors and soothing sounds right at your fingertips. Think of these bottles as tiny, swirling rainstorms or shimmering stars, ready to bring tranquility whenever you need it. With just a few simple steps, you can craft a peaceful oasis in a bottle. So, go ahead—let your creativity flow and enjoy the calming magic you’ve made!