Beeswax modeling taps into your natural warmth, making it easy to shape and refine your creations by pinching, carving, and layering. As you work, the soft, pliable wax responds intuitively to your touch, offering a meditative and satisfying experience. Its historical use for figurines, jewelry, and everyday objects connects your craft to a rich tradition. If you keep exploring, you’ll uncover even more techniques to enhance your warm-hand creativity.
Key Takeaways
- Beeswax’s natural softness when warmed by hand allows intuitive, tactile modeling for creative projects.
- Using warmth, artists can easily shape and refine details in jewelry, figurines, and household items.
- The softening property enables layering and smoothing, fostering realistic and intricate designs.
- Warm-hand techniques connect craftspersons to historical traditions of beeswax artistry.
- Engaging with beeswax in a warm environment promotes meditative, sensory-rich creative expression.

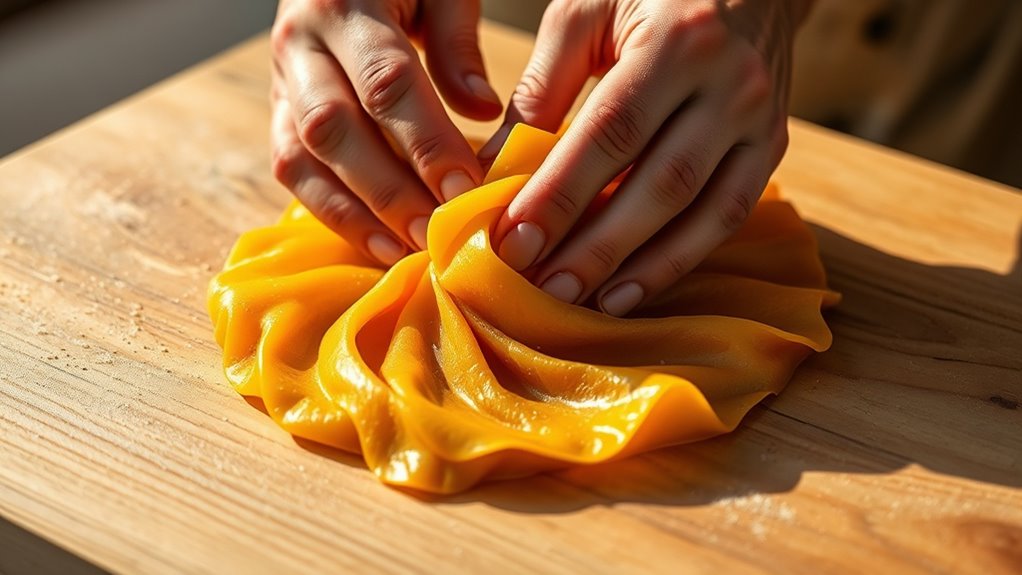
Beeswax modeling is a fascinating craft that allows you to create intricate sculptures and functional objects from natural wax. When you start exploring this art form, it’s helpful to understand the techniques overview, which encompasses a variety of methods such as pinching, carving, smoothing, and layering. These techniques enable you to shape the wax with precision, whether you’re crafting delicate jewelry, detailed figurines, or practical household items. As you manipulate the warm wax, you’ll find that working with your hands is intuitive and satisfying, especially because beeswax softens at body temperature, making it easy to mold and refine. You can also incorporate tools like needles, spatulas, or even your fingernails to add fine details or achieve smooth surfaces, enhancing your overall craftsmanship. Additionally, practicing these techniques can help develop your skills gradually and build confidence in your artistic expression.
Understanding the historical uses of beeswax modeling adds depth to your practice. For centuries, beeswax has been utilized across various cultures, primarily for creating religious icons, ceremonial objects, and small sculptures. In ancient Egypt, artisans modeled beeswax into miniature figures and offerings, appreciating its durability and ease of shaping. During the European Renaissance, wax modeling was a key step in the process of creating realistic wax portrait busts, which served as preparatory studies for larger sculptures or as standalone art pieces. Beeswax was also traditionally used for sealing documents and crafting candles, showcasing its versatile nature. Recognizing these historical applications can inspire you to appreciate the significance of beeswax beyond its physical properties, connecting your work to a long legacy of artistic and practical use. Furthermore, the low light pollution in some hidden gems for camping locations can provide a peaceful environment for night-time work on your models.
As you explore beeswax modeling, you’ll notice that its natural properties lend themselves to a range of artistic expressions. The warmth of the wax invites a tactile connection, making it a personal and meditative process. The techniques overview provides a foundation, but your creativity will expand as you experiment with different methods and discover what works best for your projects. Meanwhile, understanding the historical uses of beeswax enriches your perspective, highlighting its enduring value across centuries. Whether you’re inspired by ancient artisans or simply enjoy the sensory experience, beeswax modeling offers a rewarding way to channel warmth into your hands and bring your ideas to life.
Frequently Asked Questions
How Long Does Beeswax Modeling Typically Take?
Beeswax modeling usually takes about 20 to 30 minutes, depending on your sculpting project. You’ll want to keep the beeswax at a warm, workable temperature, so it’s easy to mold. Use your sculpting tools to shape it smoothly. The time varies based on complexity, but with patience, you can achieve detailed designs comfortably within this timeframe. Keep the beeswax warm and your tools ready for best results.
Can Beeswax Be Reused After Shaping?
Yes, you can reuse beeswax after shaping. To preserve its quality, store it properly, ensuring beeswax preservation by keeping it in a cool, airtight container. When recycling beeswax, gently melt it down, remove impurities, and re-cast it into new shapes. This process allows you to enjoy beeswax modeling multiple times, making your creative projects more sustainable and cost-effective.
What Safety Precautions Are Necessary During Beeswax Modeling?
You should always wear gloves and work in a well-ventilated area during beeswax modeling to guarantee safety. Be allergy-aware, as some people may have sensitivities to beeswax or pollen residues. Keep your workspace clean and free of flammable materials. Avoid ingesting or inhaling fumes, and wash your hands thoroughly afterward. These precautions help protect your health and maintain a safe, enjoyable modeling environment.
Are There Beginner-Friendly Beeswax Modeling Techniques?
Thinking of diving into beeswax modeling? Start with simple shapes, blending beeswax colors to create unique effects. Don’t forget to store your creations properly—wrap them in parchment or store in airtight containers to preserve their beauty. Beginners should focus on basic techniques like rolling and pinching before advancing. With patience, you’ll master beeswax color blending and preservation, turning humble wax into stunning art, all while laughing at how easy it really is.
How Do I Fix Mistakes in Beeswax Sculptures?
If you make a mistake in your beeswax sculpture, gently smooth out the area with your fingers or a soft tool. You can also re-melt small sections with a warm tool to fix imperfections. To improve your work, try beeswax coloring to add details or depth, and consider mold making for precise shapes. Practice patience and experiment to develop your skills and create flawless sculptures.
Conclusion
As you explore beeswax modeling, remember that patience and practice pay off. With each careful shape and detail, you’re honing your skills and open your creativity. Don’t rush the process—sometimes, the best results come when you let things take their natural course. Keep experimenting and trusting your instincts; after all, Rome wasn’t built in a day. Your warm hands and steady heart will turn simple wax into something truly special.